Testing the Pendulum on and Electric Clock – fitting a quartz pendulum movement

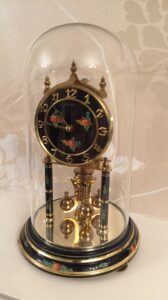
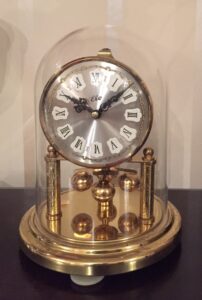
This is just a quick article to help those people who have a quartz clock with a pendulum.

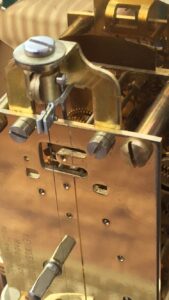
The way these clocks work is that they have a pulse generator in the electronics that activates a coil based magnet. The switch for this is linked to the pendulum swing (in different ways on different clocks) but all share the same principle. The pendulum bob contains a magnet with north polarity. The electro coil magnet that turn on and off as the pendulum swings has north polarity as well so they repel each other. The coil magnet gets a current at the precise moment the pendulum swings past it and the magnets repel each other pushing the pendulum left or right (depending on which way it is travelling). I have a brilliant Metamec clock that does this on a grand scale and looks like something out of a science experiment from the early 20th century.

The point here is that once you understand what is going on you can test the effectiveness of the coil driving the pendulum. Lets say for instance, your clocks pendulum is siwngs for two minutes and then stops. How do we diagnose the problem?

Well firstly you have to make the assumption that the failed element is either the coil or the fixed magnet, so check the fixed magnet is there and has not fallen off. You have to search with this using another weak magnet or ideally a paper clip. If the paper clip sticks to the pendulum rod at the bottom of its length then you know there is a magnet in there. Once you know the magnet is in the rod then you can check the coil.

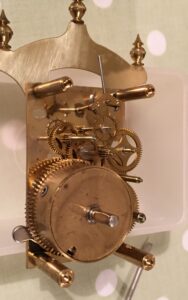
Coils rot or break. If you can find the same gauge wire with the same shielding then you can either completely replace the coil wire by re-wrapping it or connect it back up together where it is broken.

A helpful hint on this is to find out just how much power and magnetism the coil is short of in order to drive the pendulum perpetually. You can do this buy running a comparative test. You remove the battery and then swing the pendulum in as near as possible to the original arc you remember it swing back and forth through. This gives you a zero power starting point. You know how long it swings for without any power at all.

You then put the battery in. Get one out of the packet so you are absolutely sure you are not using a dud (Ive done this so many times and it has cost me a lot of confusion time and unnecessary supplier orders). Now swing the pendulum as you did when the battery was not in the unit. Measure how much longer the pendulum swings for. You see in most cases the problem with the coil is a short out. This means only a percentage of the magnetic field is being generated. Because the very low force required of the coil to keep the pendulum swinging you will find that even if the coil is shorted by 90% you will still be able to see this reflected in a longer swinging time than without any power.

This opens up options on what you can do about it because if the coil isn’t getting enough power its highly unlikely this has anything to do with the power source (although there is one thing I will come to later on). It means that the probelm is almost certainly with the coil itself and its electronic joinery. So if the pendulum is at least getting some power you can look at the following options.

  1. Check the solder joints on the end of each wire coil section. On most clocks they are single thread wind so you should only be looking for two contacts. Look carefully at the joints and if they are onto a circuit board then look at the underneath of the circuit board so check of the solder joint has gone on the board as opposed to the end of the wire. If its broken then fix it by re-soldering or establishing a reliable electronic connection in some other way – barrel joining clips can be used on some of he larger coils.
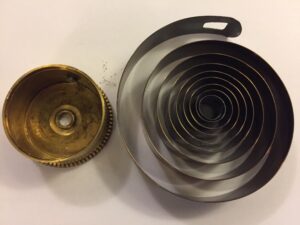
  2. Rewind the coil. You need a micrometer to measure the diameter of the copper wire. There are two diameters to measure – with and without shielding. You then work out the shielding thickness via subtraction and you have a specification for your shielded wire. Go and buy some, rewind the coil with the same length or longer and join it back up to the circuit.
  3. Buy a new movement. This is not as drastic as you might think and should really be the first option for most modern clocks of this type. You just replace the whole thing in the knowledge that your coil or main logic board has failed. Pay attention to dimensions when you buy your integrated movement and pendulum drive unit. The overall depth of your mounted movement is needs to take account of where the pendulum needs to swing. There will only be a certain deviation from is current swinging arc that will work. To explain; lets say the pendulum movement you buy is available with a 21 or 6mm spiggot. On taking your clock apart you find that what you actually need is a 16mm spiggot on the front, otherwise and the glass front wont go back on because the spiggot sticks too far through the clock. At 21mm it was never going to work and at 6mm it was never going to be enough to even get through thickness of your face (you thick face). In this case you need to pad out the mounting on the back and use the 21mm spiggot with only, say, 10mm sticking out of the face . The remaining spiggot length is being taken up by spacers you made up to mount the movement. But heres the problem. By putting he spacers in you have moved the whole movement back by maybe 1cm. If the pendulum hangs down into a glass faced section below the clock you can bet your last quid that it will not fit in this aperture without hitting the back or sides of the clock. The law of sod takes over your project. Your solution is not going to work and never was because you didn’t do your measuring taking pendulum position and length into account. I wont go through what you have to measure; if you understand the principle of what Im saying here you will know what to measure. If you dont then send me the clock to fix and absorb the cost as its not worth you trying and failing and getting terribly frustrated with it. Thats my job, or was a few years ago when I first started doing these. Now I have a method.
  4. If you look at the back of your clock and see that the unit uses two batteries in two separate areas of the clock then you may have an independent pendulum unit with a standard quartz movement in its centre. These are separate components and can be replaced individually. So, if you clock isn’t working but your pendulum is running fine you may just have to replace the clock movement and not the pendulum. This is handy because for a few reasons. Firstly you can buy a new 57mm quartz movement which tend to be standard size for the hand fit. This means you can use your original hands. Secondly the solution is going to be cheaper because there is no need to replace everything. Lastly and most importantly there is an element of standardisation is what these pendulum movements drive and you will probably be able to use your old pendulum with it as they are overpowered in order to drive a wider range of pendulums – completely logical from a design brief and market point of view. Essentially, because its a universal type of product, it is overpowered in my experience which means its more likely to drive whatever pendulum weight or length you have. With the fixed units where you have a truly integrated movement and pendulum driver, you will find that they are only compatible with a range of pendulums. A good bit of advice is to buy a pendulum from the same place at the same time. Its only a few pounds more and allows you a test unit if nothing else. If you get one without buying a guaranteed compatible pendulum how are you going to know if the unit is faulty, badly fitted, or if your pendulum is too heavy. Another area of incompatibility is centre of gravity. The fixings on these units tend to vary from manufacturer to manufacturer so its really easy to get a unit where your existing pendulum cannot be modified to adapt to its new fixing to its armature on the movement. In short, get a back stop position by having a pendulum that you know is compatible before you start work on it. It saves loads of time in the trouble shooting phase.

I do these clocks so if you don’t like the look of all the above give me a ring and I should be able to quote you on the spot after a few questions. Prices vary drastically between £30 and £200 for some of the really really hard fits with only a mm to spare in some areas. There are just not as many types and variants on the integrated pendulum and clock units which means some really imaginative custom fitting on most occasions. While I have my methods, this is one type of job that rarely repeats in exactly the same way and everything is a custom fit in most cases.

Time is money and its never a quick job unless you are lucky to be able to get a exactly the same movement. Even then, through slight design revisions and improvements, the compatible nature of exactly the same movement produced five years apart is far from 100% on most occasions. Its silly things like where they mount the time change button on the back not matching the hole in your clock to gain access to the same. Hanging fixings often change and it means they need to be sawn off. If you saw a quartz movement the vibrations can kill it dead so it means hot wire for cutting and so on and so forth. A lot of work normally and a surprising amount for what should technically be more akin to changing the toner cartridge on a photocopier.

As usual this started as a quick article and has turned into a two hour marathon of cross referencing and developing an understandable narrative. I wouldn’t do it unless I enjoyed it. The other thing is its really quite empowering broadcasting help to such a wide audience. It encourages and motivates me to make what I say understandable. I hope you do.

Guest Blogger Phil Harris – Clock Curator at The Black Country Living Museum. 400 day anniversary clocks..

Phil Harris is the clock curator at the Black Country Living Museum in Dudley (www.bclm.co.uk), which in clock terms, is pretty high kudos. Ive been chatting to Phil via email for maybe a year or more and we often exchange comments on articles and suchlike. Hes really good, and like me, appreciates the antiquity of clocks as much as the engineering.

Ive always said if you want to get into history and you need a thread to follow, clocks make an excellent job of pulling everything together because they are both engineering and interior and exterior design based objects. If you know what a 16th century clock looks like you are pretty close to being able to identify a lot of 16th century furniture or other antique items because design fashion runs in layers through the production of all household goods, rather like the strata you see in geology; different colours and textures in each sequential layer. 

Although phil doesnt repair clocks commercially like me and my associates, he does a museum quality rebuild on the clocks given to his care. That is the top of the game. If you can produce museum quality work you are among the best.

Without people like Phil the world would not be the wonderfully interesting place that it is, and Phil is a testament to what can be achieved if you take time and care over a projects over years and years. A rare breed.

Because he repairs the clocks at a museum the detail is incredibly important, anything less than perfect would be a misrepresentation of our history.

I think Phil thoroughly deserves to be Braintree Clock Repairs first Guest blogger and I can completely endorse him, his work and the people he gives his time to. Brilliant. Anyway, over the Phil…

Hi, I’m Phil Harris and I’ve been following Justin’s fascinating blogs for some time. I am not a professional clock repairer like Justin; I’m a retired Chartered Engineer but merely a self-taught amateur horologist, and I look after the clocks at a local Museum as a volunteer. In correspondence with Justin, I mentioned my interest in 400-day clocks, and Justin very kindly agreed [I begged him – hes brilliant – Justin] that I could write a blog about these intriguing clocks.

The 400-day or “Anniversary Clock” is a decorative mechanical clock, often covered by a clear glass or acrylic dome, which employs a very slow-turning torsion pendulum. Together with a powerful mainspring and extra arbors in the gear train, which give an overall gear ratio of around 30,000-to-1, these clocks are designed to run for a whole year between windings, hence the name… you wind it up just once a year, on an important anniversary. In contrast, conventional mechanical clocks are usually designed to run for 8 or 14 days.

400DayClockBlog1

However, such long running – roughly fifty times longer than a conventional 8-day clock – doesn’t come easy. The entire movement is a precision mechanism which needs to be in absolutely pristine condition. The pendulum ‘ticks’ just once every few seconds. Any dirt, old sticky oil or maladjustment is likely to stop the clock. The most delicate part is the thin vertical suspension spring which carries the rotating pendulum bob, and being a mere couple of thousandths of an inch thick, suspensions easily get broken. Fortunately replacements are available, but somewhat awkward to fit unless you have the right tools, dexterity and patience. But, by all means, order a new suspension spring and replace the broken one.

400DayClockBlog2

Sadly, things aren’t always quite that simple. There are about 25 different thicknesses of suspension spring; which one does your clock need? how long should it be? Luckily this information is again readily available, but you’ll need to buy a book – the excellent ‘Horolovar 400-day Clock Repair Guide’ – or ask someone who has a copy, in order to find what you need. And once you’ve fitted the new suspension spring, the likelihood is that the clock won’t run for more than 15 minutes. If you’re lucky, this will be because the suspension simply needs to be put ‘in beat’ which can perhaps take several hours of making tiny adjustments to the upper support block. If you’re unlucky – as seems to happen with four out of every five clocks that I encounter – some other fault is present, and the clock will have to be dismantled and repaired.

Anniversary clocks come in three sizes, standard, miniature and midget, in decreasing order of size and increasing level of difficulty. Many standard-sized clocks are older and more valuable, whereas the miniatures and midgets became increasingly popular from the 1950s onwards and are more likely to appear on the second-hand market. Made mainly in Germany up to the late 1970s, few spare parts are available nowadays other than suspension springs, blocks and forks, main springs and glass or plastic domes. So, what are the likely problems you could encounter?

400DayClockBlog3

I have repaired clocks where a breaking main spring or ratchet wheel has released enough energy to bend a solid steel arbor or gear shaft, and bend or break gearwheel teeth clean off. My most recent clock had been dismantled and reassembled incorrectly by a previous owner, who had bent one of the tiny pin pallets in the process. This had to be replaced, using a 0.3mm diameter piece of hardened and tempered steel wire.

I have also encountered clocks with bent centre shafts – the tiniest amount of inaccuracy here will add enough friction to the motion work that drives the hands to prevent the clock from running – so every component must be cleaned, preferably using clock cleaning fluid in an ultrasonic bath, then carefully inspected under magnification.

The small pivots at the end of each arbor, together with their matching pivot holes in the plates, must be highly polished in order to reduce friction to the absolute minimum. The closer you look at these small parts, the more you notice the surface roughness of gear and pinion teeth, which often need to be polished away. And the mainspring always needs to be removed, cleaned and lubricated and refitted, or occasionally replaced, a job that definitely requires the right tools. Once all this is done, the gear train can be assembled between the plates and tested for free movement.

400DayClockBlog4

The escapement – the key part of the movement which drives and regulates the swing of the pendulum – comes in two types, Graham dead-beat and pin-pallet, and both have their own nuances and quirks. Sadly it is common to find that some previous owner or ‘repairer’ has twiddled one or all of the possible adjustments in a failed attempt to get the clock to run, when all it really needed was a good clean and service. Many then end up for sale on eBay… Adjusting a 400-day clock escapement can take many hours of further work making tiny changes, then reassembling and testing, and finally adjusted for good timekeeping before the clock can be considered reliable.

Personally, I wouldn’t advise anyone to tackle a 400-day as their first clock to repair. I had restored around 60 ‘conventional’ clocks before I took on my first 400-day clock, and I soon realised how much I still had to learn! 400DayClockBlog5

A lot of 400-day clocks were given as presents or wedding gifts and often have a sentimental value far in excess of their monetary worth, but these clocks are generally well-made and when properly cared-for and serviced, can carry on working literally for generations. Because so much work is involved, however, many professional clock repairers nowadays simply refuse to accept 400-day clocks for servicing or repair. Fortunately, though, Justin at Braintree Clock Repairs still takes these beautiful clocks on, at very reasonable prices, and gives a guarantee on all his work. Why not give him a call?
Phil Harris CEng FCIBSE MIEE

[Thanks for you kind words Phil, but more importantly thanks for sharing your excellent experience and knowledge. I have deep respect for any man who knows the overall gear ratio of a 400 day clock to be 30,000 to 1. I did not know this but it is now burnt into my memory by the shame of being “out-knowledged”.  Thanks again old chap – Justin]

How to quickly regulate a grandfather clock (Grandfather Clock Running Fast or Slow)

This article is for all you clockists out there who love their grandfather clock but cant afford to get a professional clock repairer in to stop it running fast or slow. You just live with it dont you. Well you dont have to. Its inhumane to have to bear this burden mild irritation caused by a favourite family heirloom looking like a inefficient ancestor. Like having Baldrick from Blackadder shouting the time out incorrectly in the corner of the hallway “its 63 minutes past the turnip and Im related to you”.

Well stop blaming the clock and do something to help it!. For gods sake whats wrong with you. How can you live with that “clock” telling you the wrong time when its the single and only thing its supposed to get right. Its no good just having a pretty face. A clock should have the brains too.

Well heres a surprise. Its your fault clock owner. Youve just put up with it thinking nothing can be done and let a fantastically clever device fall into retardation or hyperactivity. Your a sinner but redemption can be yours if you follow the light shone in the dark by Braintree Clock Repairs. Which is me, Justin. And some people. Important people. Sorry. Anyway.

This is how its done.

First you need to understand the importance of the seconds hand in this rapid regulation method. The seconds hand you see ticking away on the face is connected and driven directly by the escape wheel. The escape wheel has 60 teeth. There is no gearing. The seconds hand is going round at exactly the same rate as the escape wheel because the seconds hand is mounted on an extension of the escape wheel pinion. What you are seeing in the seconds hand is the heart of the clock, the escapement wheel, beating at one revolution per minute at 60 beats / wheel teeth (providing the clock is correctly regulated). Its the cog that has one job; to give the pendulum a push and keep it running against the very slight frictions invloved in its swing. Its where the pedal hits the metal so to speak. In doing this it is keeping track of the swing rate and displaying this directly through the seconds hand.

So the the escape wheel drives the pendulum, and the seconds hand is just like a hub cap on a wheel. It is connected to the wheel directly and goes round at exactly the same speed unless your a “gangsta rapper with spinning hubs”.  Incidentally, if you are actually a gangsta rapper I mean no disrespect, its just that the analogy wont work for you and you might..shoot me or something. Anyway.

The escapement cogs 60 teeth pass the pendulum pallets at a rate defined by the time it takes the pendulum to swing once back and forth. One swing, one movement forward of the escapement wheel teeth. Therefore if the clock is to be entirely accurate then the pendulum will be swinging back and forth exactly once each second. In short, each tick tock is supposed to be one second long. So, what is going on is that the rate the pendulum swings at is being displayed on the front of the clock by the seconds hand.

Now, the lower the centre of gravity a pendulum is, the slower it swings back and forth. Therefore if you have the pendulum bob set too high up the clock will tick tock away every, say, 0.9 seconds. This will therefore give you a clock that is 6 seconds fast per minute because its running and 110% of the speed of a second. Or to put it another way, if you pendulum is swinging at 1.1 beats per second its adding .1 second to its time keeping every second which means .1 x 60 seconds which is 6 seconds. Actually, dont get caught up with the maths bit here, you dont have to understand the maths to regulate a clock – Im just giving those with a mathematical mind a frame or reference. All you need to know is that lowering the pendulum bob will make the pendulum run faster and heightening it will speed up the pendulum, and therefore the seconds hand. Regulation is simply a process of synchronising the pendulum swing frequency to exactly one second.

To move the pendulum bob up and down you use the screw that should be supporting it at the base of the pendulum rod. This is square normally so you can easily perform a quarter turn accurately (and an eighth). The bob should be sitting firmly on this. If you screw it upwards the pendulum bob rises and the clock runs faster. Unscrew it and the pendulum bob lowers and the clock runs slower.

So how do you find exactly the right height for the pendulum bob to be for the pendulum to swing at exactly one second per swing?

You use the dividing halves rule.

This is how it works.

The clock will either be running fast or slow otherwise you wouldnt be reading this. This is because the pendulum bob is not in that “sweet spot” where it will cause the pendulum to swing once a second. You have to find the sweet spot by manually mathematically searching for it. Maths truly applied.

  1. Get an accurate clock such as a chronograph or quartz watch.

  2. If the clock is running fast turn the nut at the bottom through ten full rotations downwards. The opposite if its running slow.

  3. Time the clock over 5 minutes against your reference time piece

  4. If it is stilll running fast then go another 10 turns down.

  5. Keep going ten 10 turns per 5 minute measurement until the clock is running incorrectly in the opposite fashion i.e. it has gone from fast to slow or slow to fast.

  6. You then know you have passed the sweet spot on the pendulum within 10 turns.

  7. You then change to five turns in the opposite direction of rotation. If the clock is still running incorrectly in the same direction (slow or fast) you know the sweet spot is within 5 turns in the rotation you are currently proceeding in (up or down).

  8. Now proceed 2.5 turns in the direction of the sweet spot.

  9. If you overshoot it then reverse back 1.25 turns. If this is still overshot then half a turn forwards or backwards.

  10. Just keep halving the rotations and chasing in the upward or downward direction of the sweet spot.

This is a great method and quickly allows you to regulate a clock quite accurately very quickly. It can be done in a couple of hours if you pay attention. Once you have done a few “ups” and “downs” searching for the sweet spot by effectively passing it within a know margin you can then half reverse to see which side, up or down, the sweet spot is. By reducing by half, very quickly, you are passing the sweet spot by fractions of a turn on each 5 minute test run.

A few hints and tricks.

Write down and draw what you are doing. So the first entry on your sheet should note that the clock is running “x” minutes fast and that you have changed the pendulum bob level ten turns down. Each ajustment you make, take a note of it. So your second entry might be “clock went from running fast to slow after 10 turns down. It was running 10 seconds fast but is now 7 seconds slow”. Be as literal as that – it only takes a little longer. The thing is because you are going to be going up and down searching for the sweet spot its really really easy to forget how many turns you are on and in which direction you are searching. These notes are a godsend and remember this is a two hour process. Imaging getting mixed up after one and a half hours. Michael Finnnegen begin again. Grrrrr.

Each time you run your five minute (or 20 minute if you have the time) measurement session you are going to have reset it against the control clock / watch. This is more difficult than you think because when you watch says its exactly on the minute you have to have the seconds hand on the 60 postion and then swing the pendulum. If you stop the pendulum swinging on each test run its very hard to set it swinging with exactly the same arc as it will setttle into after its running in perpetual motion aided by the escapment pushing it. This means that at first the swing will be slightly longer than it settles into, and innacurate. Ideally you just want the pendulum to keep swinging and the clock to be frozen in time until you press a magic button to start it running. Thats what this method is.

If you simply stop the seconds hand going round with your finger the clock will stop but the pendulum will continue to swing for quite a while. This means that you can advance the clock to say exactly 6pm (assuming the actual time is 5.59.45 pm) and stop the seconds hand until the control clock has caught up to 6pm. At the exact second of 6pm you simply pull you finger off the seconds hand and you will find the clocks are so closely synchronised you can hold one and the other in field of view and see they are ticking the seconds away at the same initial rate (well they are not but it takes 5 minutes for the difference to be perceptible via accumulation). The great thing here is that you can just watch your control time piece without looking at the grandfather clock at all with this little gem of a trick. If it were not for this, the dividing halves method would only be accurate to 1 or two seconds per 5 minutes which amounts to around 5 minutes loss or gain a day coincdentally. Too much. With this fast method you can get it down to 1 minute a day with a couple of hours work.

With grandfather clocks its all about the accuracy of the test runs, which in turn, is about an efficient method of sychronisation with your control clock. After you have that sorted with the finger stop method your realy just lowering and heightening the bob to a lesser and lesser degree past an invisible sweet spot which you find by testing against a control clock.

You can only get so far on 5 minute tests. To increase the accuracy of this method each test should really be a week but then you are talking about fine tuning almost beyond the clocks capacity for accuracy. There is varying friction with temperature and even humidity so its never going to be atomic clock accurate but I would say you should be able to get a grandfather clock as accurate as a decent mechanical watch. Apart from the really good grandfather clocks costing a lot of money you can expect a gain or loss of a few minutes a week. Variations in temperature can do that because the pendulum rods tend to be made of steel which expands and stretches as it becomes warmer, so in reality you are never going to get second accurate time out of your clock. Having said that your winding it once a week so you can correct it at that point. Electric clocks are never entirely accurate and because you dont wind them there is actually far more risk of these clocks accruing a time lag or gain over time, than there is for a grandfather clock. The mechanical clock, is by it nature, a more reliably accurate every day time keeper with the right treatment.

Easy really, but you have to know how.

Now you do.

If you dont get this then read it again more slowly. It does make sense and you will eventually have a eureka moment and it will all seem so obvious. Your Baldrick will turn into Blackadder the III and you will have an efficient and smart companion. And absolution sinner.

Bach clocks and Tom Auctions

Tom who runs the auctions at the antiques centre got me into Bach by understanding his music. He knew I would like it because of the synchopation and timing.

So Iistened to it. I like a bit of Mozart, Vivaldi, Holst but had not really listened to Bach as I considered it slightly regal sounding – pompous even. I’ve changed my mind. I wasn’t listening to it properly.

I listened to it and Tom Auctions (surname suppressed to protect from Mozart activists) was spot on.

Bach is a master of timing with each section operating at a normally stocatto tempo complimenting the synchopation of each other. It’s not true of everything I’ve listed to as he does solo sections but overall its the most clock like classical music I’ve enjoyed.

The interesting thing is that I often have several clocks on test at any particular time. Grandfather’s run at 120 ticks and tocks a minute and other clocks at divisions of this number e.g 240, 480. Other clocks have escapements running at half minute beat divisions so 180bps is a tempo I am oddly familiar with for instance. At any rate, the frequencies if balanced in matched single beat tempo form an aural interference pattern with several clocks striking the same beat at once and then continuing along at their own tempo until they meet again in a complex waltz of synchronisation.

I hadn’t really expected that but Tom was right and I now know why Bach is held in such high regard. Clocks.


Masive discovery thats completely exciting and da vince code

Ok so I may have oversold in in the title but Im going to be honest with you, I cried when I made this discovery. Genuinely. Tears welling up in my eyes. Heres the story.

I got called this morning, (by the way I am writing this immediately after the event and am still pumped about it), by a 90 year old woman with several clocks. I was expecting to pick up a couple for repair and there was nothing particularly special about the call as far as I was concerned.

On entering the residence I was duly greeted and gagged myself with a face mask that I hate wearing because its now not really that necessary and the chances of meeting anyone with covid are remote in my region, Essex. Anyway, with steaming glasses we proceeded to go over the clocks. The first one was a novelty cuckoo with a coffin movement made for about 8 sheckels or whatever currency they were using at the time of its manufacture. An awful clock to fix because the cases are glued on these units on the assumption that once it was worn out nobody would consider a fix so why make the movement removable. I have had three of these in a row which I have taken on because I take on anything and its about how much the clock means to people, not its quality. But it hasnt been profitable or fun. Hacking away at 70 year old glue on matchwood while maintaining the integrity of the joins for reassembly is almost impossible meaning B&*$% woodwork has to be done on top of fixing a movement that has no equal for bad transient quality before failure.

The woman was 90 years old. She loved the clock. I had to get it going in the minimum possible time without taking it away. So I cleaned it out with a washing brush, bent a few wires to allow for oxidation and stiffness, gave it an oil and….it worked. Even I was surprised.

Then the next clock. This is where it gets interesting. What she showed me was a completely original museum condition mantle clock of medium to high quality from the deco era. Here it is.

IMG_20200905_172031_8

I have a good knowledge of Antiques which is why I work from an antiques centre. This knowledge has been considerably added to over the years of working with clocks because examples date back to the 16th century and the clock and case evolved over the decades of the centuries in line with the styles of the time. So, if you know what a clock from 1700 looks like then its pretty easy to spot other items like tables or chairs that share the same styling. Equally if you are looking at antiques with any techinical aspect, they will reflect the manufacturing methods of clocks at the time so you are able to date and identify via that association.

The clock in the photo is clearly from the Deco period and there is a hidden reference in the design. You see the deco period is defined as from 1910 onwards to the Exposition Internationale des Arts Décoratifs et Industriels Modernes held in Paris in 1925. 3 Years earlier Howard Carter had discovered the Tomb of Tutankahmun and this ploughed into the deco design of the time creating a vogue for a new kind of egyptian influenced design in what one might call the “deco movement”.

Normally the view of the antiques trade is that the best deco peices are those that cover the transitional period between the bezier curves of Noveau and the pleasantly balanced dramatic lines of hard core art deco peices. Beautifully svelt posed women in 20s dresses standing on a line formed deco plinth – the best of both worlds; the boimorphic and the modernist. This clock has a little of that. Its Napoleon hat style with its biomorphic curves blend with stright lines and flare of modernist deco.

IMG_20200905_172041_6

But this clock has something else in addition. A lost hidden reference to Howard Carter and Egypt.

If you look at the centre divider on the bottom of the clock where the lines meet….they dont meet at the centre divider.

Now this is an unthinkable error on a clock of comparative quality. You have to remember that at the time this clock was made they might, socially speaking, not have been available to the lower middle or lower classes of the time. Victorian England and the empire had created a wide middle class and wealth which prevailed into the 20th century, and prevails today.  But, still, the majority were not wealthy. The Middle class was much thinner than it is today. So, owning a clock might be compared to owning an expensive car today, or perhaps just a car in 1960 – not everyone had one by any means. So in 1925 having a clock was probably something like having a good Mercedes. Now if you buy a Mercedes and the number plate is 10 cm to the left so it shows, you take it back. You just do. And the same would have applied with this clock.

The idea that the centre point of the triangle does not intersect with the terminating point of the flared outward lines is unthinkable in deco design terms. So why is it like that? Its because its deliberate.

Its extremely clever and its a hidden reference to Howard Carters discovery in egypt iconified by the pyramids – the greatest of the tombs. You see the pyramids are arranged in a banana shaped line if looked at from far above. This, many stipulate, is a reflection of the pattern contained in the stars of Orions belt, a star constellation that is thought to have had significance to Egyptian religion.

If you look at the centre pointer you will see there are infact two triangles. One infront of the other. One side of the formost triangle has been more lightly coloured to give it a 3d effect. This is not an accident of polishing – I checked with the owner and she had never polished it. The reason the triangles are off centre is because they represent the two larger pyramids at Giza viewed from a slight elevation that allows you to see both. The reasons the lines dont meet at the top of the triangle is because they are running to the location of the third pyramid obscured from view that is OFFSET from the line of sight of the first two large pyramids . Its a little hidden cameo of the pyramids, suggested as a normal deco design value. Whats even more clever is that you either get it or you dont. If you dont get it, to the casual eye all you see is more deco lines and a central point of focus that your mind peridorically centres. If you do get it, you see the pyramids. You need to consider that at the time the clock was made there was Tutankhamun fever, enough of it for a reasonable proportion of people, albeit only the educated with their “mercedes”, to get it.

You also have to remember that at the time, the vista of the three pyramids sitting on the horizon would have been a common illustration; something people found fascinating and familiar. Whats really really clever here is that a third pyramid offset in the design would utterly ruin the symmetric design values of deco, so rather than put it in, the maker has put a secret pointer to where it is at the theoretical meeting point of the flare lines. This subtextually identifies the top two triangles as pyramids. He or she got a non sytmetrical design reference into a symetrical appearing design. I mean its brilliant and takes real flare. Alas, the movement is unmarked, and while I could probably track down the maker (The pendulum looks suspiciously like a Britiannia movement pendulum) the case and face are not branded in any way. Perhaps the designer was more inclined to put the cheeky reference in because of this anonymity. We will never know who or how but thats what makes it even more brilliant.

To be fair, I dont actualy know if this is something that was hidden at the time. It may be that the people who originally bought the clock were perfectly aware of the reference and found it appealing and in vogue, but that is certainly lost on the casual viewer today and has become a hidden reference.

Id value this clock at £400 – £600 and a museum piece. Now thats a lot for a mantle clock of this period. A really over the top obvious deco mantle of this type might go for £250 but because of the charm of the hidden message I cant see it going for less than £400. Its like antique desks with hidden compartments. They are just worth more because they are scarce and have that extra mischievous something.

Brilliant and it made my day. I felt like Carter himself must have felt. Just less. But not much less.

Oh its not for sale and Its not mine so dont even ask. If you have one…..I envy you.