
Clocks and astronomy go hand in hand. This blog is about clock help and info and interesting things about clocks.
This is one of the help articles but with a bit of a twist in that its about the largest clock – the universe. This needs observing obviously. So this is for anyone skirting round the idea of getting a telescope who wants good impartial experience based advice on getting started. I have no commercial interests here or loyalties or even preference. Its all nuts and bolts to me really and its just about quality.
In not going to bang on about the history and science and suchlike – its advice and answers on the important basic things around getting a telescope. the fun stuff and the quick wins on what to do.
Ill try and cover the basics of what everything does, why it does it, how and what to buy and what you can expect to see.
The first telescope I got sucked rather severely and it took several buys to really understand the relative merits of the equipment and what is possible at reasonable cost. If somebody had given me a quick introduction and pointers on what to expect it would have saved me a lot of time, so here it is.
Firstly what to buy.
There are two types of telescope generally speaking. Reflectors that use a big curved mirror like a lens, and then there are refractors that use a lens as a lens. Nautical telescopes and everyday binoculars work on the refactor principle with a lens at each end. This is not what you need.
Get a reflecting telescope because they collect more light.
The 4″ mirror in the telescope has a much bigger surface area than the retina in your eye so everything “it looks at” appears much brighter to “it”. The bigger eye can collect more light per square cm in view which translates as a brighter image. Imagine your eye with a 4 inch diameter, and how bright everything would be. It wouldnt be a magnified view either – you would see what you see right now, just much more brightly, probably blindingly so.
This is what a reflecting telescope is – a big light collector. The bigger the better, and the brighter your view of feint sky objects like galaxies will be.
There is an important thing to understand at this point. Everyone is used to nautical telescopes and binoculars that zoom in and are used to MAGNIFY things. That increases RESOLUTION. Astronomers don’t care about resolution as much as they do being able to see whats going on in a massive dark room with appalling lighting trying to open the Thermos with gloves on and spilling it all over the eye peices. A reflecting telescope therefore increases the INTENSITY of the light you can see because it collects more light per unit of area in front of it.
Imagine a water mark on a bank note. If you want to see the water mark you hold it up to the light because its too feint if you don’t. The same thing applies reversed in astronomy. You can only see the object if you get more light from it. The way to collect more light is to have a larger surface area collecting it. If you do that you see things that you cant see at lower light collection levels. This is the basis for astronomical observation generally in visible light wavelengths.
So, there are big objects in the sky you cant see with the naked eye because they are very feint water mark types of objects like galaxies and star clusters. A reflecting telescope reveals them. The Andromeda galaxy is as big as the moon in the sky yet most people have never seen it. It can be seen as a very feint object on a very dark night but it hardly sticks out in the sky.
The same area of sky viewed through a 4″ reflecting telescope reveals the galaxy entirely as if somebody had shone a light on it from all angles. It looks like a smudge of smoke.
It is in fact billions and billions of stars too small to see individually, but that generate light collectively. Smoke is, after all, just groups of little particles but we don’t see, what we actually see the effect of their collective light reflection.
Its the same with galaxies. Remember the stars are separated by light years and are only a few hundred thousand miles diameter – as in our galaxy. Thats probably equivalent to one smoke particle per square mile or something ridiculous like that. The quantities are unimportant; its principle that a a large enough group of widely distributed objects, if viewed from far enough away, take on a shape and thats what many deep sky “objects” are. Consequently they are feint and hard to see.
A 10″ telescope does not have twice the collecting power of a 5″. It has Pi x R squared which roughly equates to 78.5 sq inches to 19.4 sq inches – four times the value. This for only doubling the diameter. One of the reasons its hard to select a starting scope is that you know for every jump in price bracket (based on telescope mirror diameter) there is a disproportionate gain in the key performance statistic – light collection.
You will seriously consider a 6″ and frankly…. I would, but Id be doing knowing it was too much money for too little performance gain. Id go in at 8 if not 10 as you may as well go straight to the top if you know thats where your heading anyway…….but that advice is for you maniacs out there, not us stable value for money sorts who do our homework reading a blog like this and get the best deal.
Also a big scope needs mounting and its expensive. You have to look after it. I will keep my cheap one in a corner of the garden with a cover and not worry too much about it. Ill probably use it once a month and special events – you can see the ISS with it for instance and some people say you can resolve the shape although I’m not sure I believe it.
A 4″ reflector is by far the best starting size and there is no real reason to go above that as it will keep you busy for some time as a casual observer of planets, lunar and cometary stuff.
When you outgrow it sell it and upgrade two steps by which time you will know exactly what sort of setup you want in terms of tech and targets. Some people just do planets and gear up to optimise on that, while others like wide field / meteor spotting setups with custom shape shifting seating and supported equipment – effortless comfort based observing.
Some of its heated I believe and there is a binocular format setup. Imagine a comfortable outsized swivel chair with two traffic cones mounted pointing skyward in a polymer pod and you get the overall idea. Having handed all this advice out on getting a modest 4″, the super comfort setup with huge supported binoculars is what I would go for in an ideal world.
Its is not mentioned much when you buy a telescope, but Patrick Moores eye looked like that for a reason. You get single eye strain and muscle cramps in your brow and cheek occasionally. Eventually you look permanently indignantly surprised. So its binoculars at some point if I get back into it seriously.
Only some galaxies can be seen in a 4″. If you want galaxies jump straight to an 8 or a 10″ but prices start get a bit hairy. One galaxy is much the same as another so 4″ wins the value argument hands down. You can only see Saturn once for the first time and seeing it 4x the size is nice, rather than life changing. As long as you can reslove it to some degree its the same experience for the most part. Awe.
So how does the zoom work – there must be one?…All that collected light needs to be channeled and focused into your eye.
Because of the way these telescopes are designed there is no true “zoom” function. Instead, if you want to look in more detail at a section of what you see, you use a higher magnification eye piece. The eye peices are a standard size and come in various magnifications quoted in mm e.g. 20mm, 12mm, 5mm in increasing magnification.
From memory, the moon fully fills the view with a 10mm eye peice and then a 5mm might let you look at 10% of the moons surface in high detail. Im a bit off on specifics as Ive only just got my latest scope after a break of a few years.
Dont bother with a GPS based system as they are expensive and ruin the fun of learning sky coordinates and getting stuck in a bit more generally. Its the sort of thing you buy later on and get a derivative that suits your needs.
So thats what they do generally on the light collecting front but the other thing they are really good for is looking at planets.
You have seen Jupiter many times even if you don’t realise it. Its a very bright star in the spring / summer sky. When you look at it through a 4″ reflecting telescope you see a disc, not a twinkling star. On a clear night, if you focus you can see the red stripes across it.
Its humbling but none more so than Saturn. This is seen in the winter months. Whats astonishing about this is that you can see it in 3 dimensions. With Jupiter, its a disc. With Saturn you can see the rings offset at an angle. Your seeing perspective on another planet. You will not forget the first time you see it.
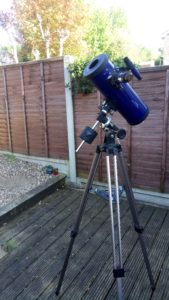
Its all well worth getting into for a couple of hundred pounds which gets you the sort of setup you can see below. I actually got this for £30 from a second hand store and repaired the tripod as you might imagine being repair obsessed. Its in perfect condition although I have to get the eye peices separately at some cost.
 In terms of setting up the scope its straight forward. First learn the Equitorial Coordinate system which divides up the sky into two axis. I said straight forward, not quick, however all you have to learn is where the axis run from and how the divisions of units work up and down in the N/S E/W rotations. Its fully explained here:
to https://en.wikipedia.org/wiki/Equatorial_coordinate_system
The scope unpacks and assembles easily usually. They are designed for home garden use. There are no hair spring or ultra sensitive adjustments to make.
Because its generally designed to look at quite a large arc of sky most scopes are only really looking to be accurate to 1 degree from and engineering perspective on the dials. Its worth going for a Meade or Celestron or better rather than a brown label Chinese machine simply because of the precision engineering standards on the adjusters.
As you start to look for feinter smaller things you have to work at higher magnifications so each movement of the scope is a huge movement in the field of view at high magnification. Precision adjustment becomes necessary and not having it is annoying if your struggling to see something rare.
Also, be warned, the earths rotation is noticeable at 300x times mag. You have to turn the fine adjustment to keep up with the moving object.
Some scopes come with the option of an electrically driven tracker that proceeds to turn the scope to match the rotation speed of the planet. You may as well save your money and go manual until you decide if you want a gps based system that does both tracking and automatic pointing / location for you.
The field of view (how big the circular view you can see is) in a typical small scope is 2 – 5 degrees I believe (of 360 degress / a circle). The moon is about half a degree in the sky. On this basis aiming the telescope isn’t going be that hard for bright objects and most scopes feature a wider angle side mini sighting scope for general aiming.
However, for feint ones you need to use the settings on the scope….
These work by first setting your azimuth by pointing the telescope mount (which is sloped) north and setting your latitude on the base mount (easy). This means its lined parallel with the central axis of the earth from which the equatorial coordinate system works. Thats why its essential to learn the equatorial system. If you don’t want to learn then the machine is going to be next to useless to you on anything but the moon.
So, all you then have to do is set the vertical and horizontal dials on each axis of the telescope to the coordinate values of he objects you want to see (widely available information). The telescope will then be pointing at exactly what you want to see give or take a degree or so. Fine positioning of the image in the centre of the view is then done via two easily accessible screw handles designed for the purpose.
And thats it. How to buy and get a telescope up and running so you can see what is really going on in the night sky.
Lastly, some temptation….. you can fit your phones camera to the eye piece hole and take long exposure photos. This is good because you get the colour. To explain, in darkness your eyes adjust to heighten contrast and increases the aperture of your iris to let more light in your eye. What a lot of people are not aware of is that it also turns off your ability to see as much colour while increasing your ability to discern black and white. This means what you see in the sky with the naked eye is actually the black and white version of what is up there to some degree. The camera, however, doesnt lie. It picks up the colour so you get to see whats really there.
Theres also a cheat available with electronic imaging. You can increase the exposure time which simulates using a bigger mirror and getting more light. Your tracking has to be right to do this and its a slippery slope to investing in a purpose built CCD camera eyepiece and adaptor with all sorts of exotic software filters and suchlike. Great fun for tech heads and it also opens up computer aided observation where……you dont have to actually be there. Heresy of course, but it is the future.
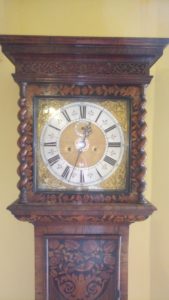
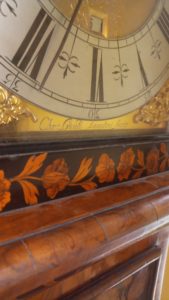
Well its been an interesting change from clocks but to be fair it was clocks really. Everything can be explained by clocks in one way or another. Key stones of civilization, blah blah, fundements of technology yawn zzzzz…
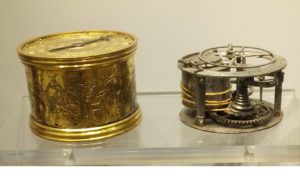
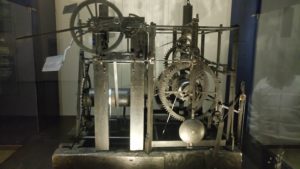
Back to repairing clocks.


 Unwinding the springs was a 90 degree rotation at a time with thick safety gloves and thick apron. In the past I’ve taken a big spring in the… well you can imagine as I was working at bench / waist height. After that you dont worry too much about the extra hassle of protective wear even if its 10 minutes of digging around for tougher protective gear out for a 2 minute job.
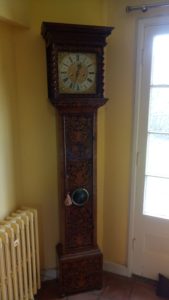


Recent Comments