Repairing Bent Barrel Pinion Gear and Why They Happen

These barrel gears are popular in all makes of wall regulators, specially those from around 1860 – 1920. Its s simple but rather ropey alternative to having to cut the pinions into the shaft and avoids complicated consturction techniques. You simply mount two bushes on the shaft and then stick pins between them. The whole thing could be done with hand tools and imagine a lot of it was although there are obvious opportunities for batch manufacturing these.

Because the movement look like they were produced to a price its fairly obvious they were using fairly soft steel for the shafts as well. This what happens.

The pins in the pinion gear wear over time and bend. Like uri-geller over 50 years. Eventually they bend so much they dont mesh properly with the cog that the are driven by. This usually means the movement goes bang one day as the pin breaks of bend so much that the driving cog slips. How fast and how badly this effects things depends on the pressures involved at the time – its usually on a full wound which is quite spectacular.

To fix this there is no quick method. Its out with the whole thing and bend the shaft straght. New the old pins need extracting and then their diameter measured. New stainless pins  need to be made and the barrel crimpted back together.

This sounds a bit like I am saying the clock is inferior. I dont see it that way. For me, as a repairer, its good common sense engineering because the eventual destruction is limited to the pinion gear as the weak point. In fixed / cut pinions the same failure of tooth integrity usually destroys both cogs. In addtion the tollerances on the barrel pinion are higher – its a rougher fit quite frankly BUT the clock is designed for this rough fit with stronger springs.

Everyone seems to chase refinement in clock production but in terms “time for the mass market” these clocks  were, and are, good solid workers in attractive understated cases. Its not surprise to me that the modern movements coming out of China at the moment (that are bulletproof) have also gone back to 19th century design principles.

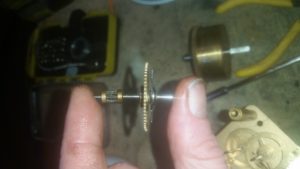
Heres one from Sue’s 1920’s regulator Im doing at the moment. Notice the bend on the shaft and the curve on the pins in the pinion. The pinion goes first and then as the gears jump the shaft is bent. The shaft can be straightened manually as there, again, is tollerance in the shaft fit to the plates. All makes perfect sense to me but many disagree. They are wrong.

People have asked me if they can just send me the damaged piece. Ufortuately not – I need the whole clock as its normally a couple of fails before everything meshes correctly and delivers a solid fix and reliable repair.

bent_ponion_gear


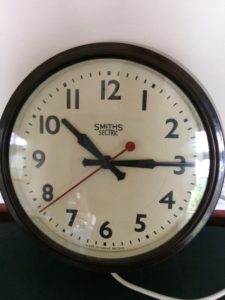
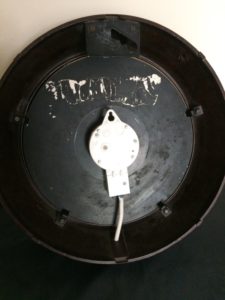
Vintage Bakelite Smiths Wall Clock Repair

This was a great looking clock to work on and repair. I would like to say the shiny finish is my work but the clock did not need laquering and came to me in almost perfect condition.

As with a lot of these clock the motor coil had given out. I can get them rewound with new copper for the purest but a far far better solution is a modern synchronous cabled movement – its less expensive, more reliable and doesnt change the core technology of the clock. Much better than a quartz movement and able to cope with heavy hands.

Its quite a job to get the old hands on the new collets but I’ve yet to find one I cant do despite the seconds hand normally being behind the minute and the hour. The old collets have to be drilled out and remade and refitted but its worth the effort to keep the old hands and maintain the look of these clocks.

IMG_0353IMG_0354


Metamec Mechanical Carriage Clock Repair

This came in to me today as a “its not working properly” repair. With carriage clocks there are only 3 reasons for this

  1. Fouling and lubrication on the going train and platform escapement components (clean required)
  2. A failed or worn platform escapement (replacement required)
  3. A faded mainspring (replacement required which involves a full clean as well)

I’ve just finished up on the clean and its running on a single wind so thats as much as needs doing on this occasion.

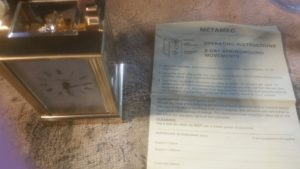
The reason for the article is actually about this being a Metamec machanical carriage clock. The odd thing is I know more about Metamec than any other clock company as they are close to me and somebody was kind enough to write a book. In all my time repairing these clocks I have never come accross a true mechanical carriage clock by Metamec – they were all electric or quartz.

This clock is actually badged “St James” and is a retirement presentation item. I was told by the owner everyone was given the same clock etc. so I assume the company had bought a stock of them. The paperwork however clearly shows its a metamec clock.

Metamec were all over the place from the 70’s onwards due to the quartz revolution and various buyouts and take overs. Its not surprising that they diversified into corporate supply at some point but I cant find a record of it apart from this clock!.

20170801_182031

Brentwood School Tower Clock Maintenance

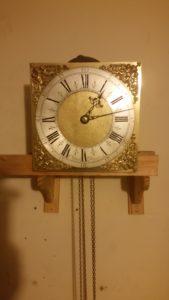
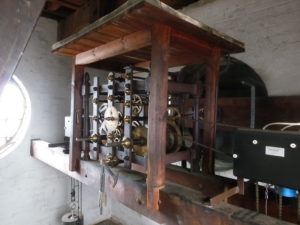
I look after the tower clocks and other fixed clocks for Brentwood school which is great fun and really quite a privilege. Theres not much to say really but it takes a great photograph!. The next job on this is to get it keeping good time (its been running a bit fast recently) and then the larger job of configuring and connecting up the bell chime which was disconneted some years ago. Ill post another article on this part of the work when its completed but for the meantime heres the clock…

DSCN1881

How to repair clocks – DIY home clock movement clean and lubricate

Ok another give away article robbing myself of a days work!.

If your clock doesnt work then cleaning it is a good first step to establishing what the problem might be. You need the thing to tick over under its own steam to diagnose problems beyond cleaning so its pretty much always the first job on the list.  Any clock repair is going to involve this.

Almost all clock hands are held on by one of two methods and you have to get them off to remove the movement from the case.

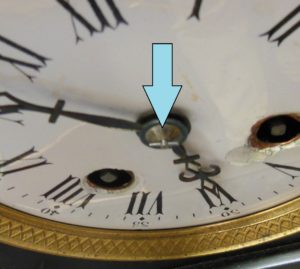
If its a lynch pin fixing then do the following. You need to remove the lynch pin that is threaded through the centre spigot. Whats not obvious is that this pin is usually tapered. This means its thicker at one end and will only be removable from the thick end. Get a magnifying glass on it and decide which end it is you want before you try to remove it. Now put a cloth or cardboard template over the face to avoid scratching it if you slip while removing the pin. You can make one by cutting slit to the centre of an A4 card or paper and then slide it onto the face with the spiggot sticking through the slit. Now use pliers to remove the pin. The hands will be friction fit so youcan just pull them off. Dont use pliers if they are stiff – oil and a firm grip with your hands through a thin polishing cloth will do it.

Clock_Repair_1


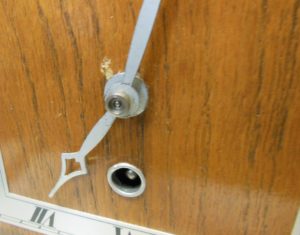
If its a screw fitting then simply unscrew it and pull of the hands as above. Its a normal thread – not a reverse one. If you snap off this nut then the clock is screwed so dont!. If its stiff then get some long handled long nosed pliers and twist it by 5 degrees – enough to loosen it but not enough to torgue snap the spiggot.

Clock_Repair_2

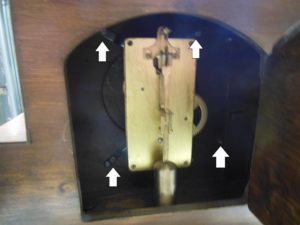
Ok once the hands are off you can remove the movement. If you look in the back of the clock you will see its held in by four screws, one at each corner that are normally on extenstion arms. You should now simply be able to pull the clock movment from the rear of the clock. If your clock has a chime bar that appears to be getting in the way do not try and wiggle it past – you will damage the chimes. Remove the chime bar by unscrewing the fixings that are mormally on the outside of the case underneath although some are fixed internally. My point is that it needs come out even if you can get the movement out without doing so because its fragile and gets easily caught by the snaggy and nature of clock movements generally.

Clock_Repair_3

Ok you have the clock movement out. Now the bad news. You have limited options without disassembling the clock completely and taking the plates apart. Ill come to how you can avoid this but generally speaking you need to get the plates apart for the following reasons.

  1. Its the best way to get at the spiggot holes cleaned.
  2. If you just put it in a bucket of hot soapy water then water gets into the spring barrells. Unless you oven dry the clock after this the springs will rust and your clock is in very bad shape with an expensive repair bill

You probably dont want to attempt to get the plates apart so heres a cheat!….

What you can do is immerse the clock upside down so only half the clock (without the spring barrels) is cleaned. This seems a bit bodge (and it is!) but it will partially clean the wheels at the top of the power train which are most sensitive to dirt. Essentially you are attacking your problems worst effected area in doing this partial immersion. It wont get a really dirty clock going again but it will give a lightly soiled clock another couple of years service before it needs it doing properly by somebody like me. If you have a low value clock you want to repair get going just because you feel like it this is a great way of making fast cheap progress.

Once you’ve soaked the movement top in soapy water then do you can to carefully brush off any dirt with a clean paint brush or ideally jet spray of some sort. You want to avoid putting anything rigid inside the movement as you will snag or force something and its game over. Once you’ve done what cleaning you can then you need to rinse the area that been submerged in boiled kettle water (careful not to get any in the barrells). Kettle water has the minerals such as calcium carbonate partially removed so any residue left by the drying water will be kept to a minimum.

Now oiling….

You need to use clock oil. I get all mine from Priory Polishes which is an old fashioned business with all the right stuff. I wont recommend specific products but have a look at the site as they do all sorts of restoration reagents including amonia based cleaning agents you can use for your immersion clean. Heres a link – you cant go wrong with this company and Paul there makes up a lot of his own chemicals to do an uber job. Hes well known in the clock trade and its “where those who know go” http://www.priorypolishes.co.uk/shop/front/

Overall I have to say that the best advice is to send the clock to me for a service because Ill do the springs for you as well. A lot of the time the main issue with failing clocks is that the main springs are worn down and are not delivering the power the clock needs to run efficiently, if at all. If a clock has been left standing fully wound but not running for a few years the springs take the form of the arbour they are tensioned on an lose power – I see a lot of that. Servicing isn’t particularly cheap, or that expesive either so I now recommend a full set of springs on every service I do on mantle clocks. If you do that you really see and hear the difference and its cheaper in the long run which is what you want if your going to spend a fair amount of money anyway.

Hope this helps your DIY efforts – you know, as always, if you mess it up I can sort it out.

Early Bavarian Cuckoo Restoration – Amazing Music Box

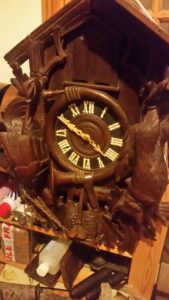
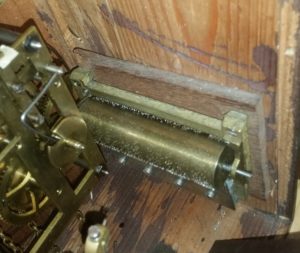
This is due for a major repair kick off this week. Its a really good example of a mid Victorian cuckoo clock with dual automaters and an exquisite music box. More on this when its underway, however, take a look at the cylinder! I dont know how many notes per sequence there are probably between one and two thousand at a broad estimate. Ive run it manually to have a listen and it sounds like an orchestra playing one instrument.

What doesnt really come over from the photographs is the size of this thing. Its a good 2ft x 1ft if not more which gives a lot of scope for carving as you can see. This is a big job as the mechanism is shot pretty much with all the cams worn and no longer doing their job. In addition there is damage to the roof and structure so the whole case will need sorting out before each section of independently mounted mechanics can by synchronised. Love it!.

Cuckoo_Clock_Repair_MB1

Cuckoo_Clock_Repair_MB2

Part II- Gough Grandfather Clock Chapter Ring Restoration

This is the second article on a rather large and advanced restoration I have been asked to undertake.

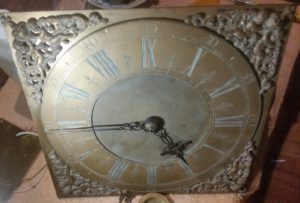
This part deals with the chapter ring repair. London style granfather faces are always a plate, a set of spandrels and a chapter ring. Sometimes there are other adornments but for the most part its just the aforementioned. To restore a face you need to get the chapter ring off and grind back any old silvering. You also need to remove the wax. Im not suggesting you do this yourself unless you have an old clock where its really a case or repair it or bin it. Its a genuinely difficult thing to do and takes a good deal of experience. Its not that the process is hard or complicated its just that you have to know the tollerances of the materials and have a set of jiggs you know the behaviour of. The reason I say this is that errors cannot be corrected. If you overgrind the engraving you ruin the clock. If you try and get the wax out with a needle and slip, you ruin the clock. If you blah blah blah you ruin the clock. You get the idea.

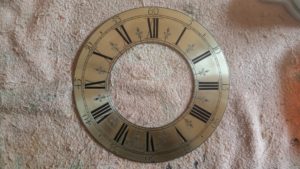
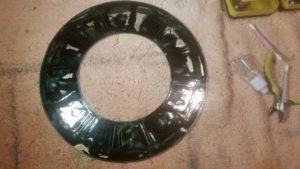
When I restore a chapter ring there are four stages. Firstly you need to thoroughly clean the face. This is a degrease, and amonia clean and a polish. Then a solvent wipe to create a completely clean surface. Once you have done this you are ready to apply the wax. This is what is used to fill the engraved numerals and markings on the dial. I use a shellac based wax that has an excellent lifetime and beautiful high gloss finish.  Applying the wax invoves gently heating the cleaned face and then using the heat of the metal to melt the wax. As you can see from the picture below you dont take any prisoners with this as you really want 100% coverage and every micro groove carved into the face to be filled.

20170608_220324

After the wax has set then its time to remove the excess to reveal the filled engraving. This invovles a spinning jig so that you can create and even circular “grain” in the metal. I use a 400 grit and hours of elbow grease to get it exactly right. Power tools are far to aggressive and a recipe for disaster so its all by hand. Doing it this way you get it exactly how you want to see it.

20170612_160535

Heres the ring after a days grinding away on jig showing the un-silvered brass face with the excess wax ground away. As you can see the engraving is perfectly presented and filled to the edges of every cut. The engraving depth remains consistent because….well because I did it that way and took care!. This took 3 attempts as on the first two the final stage of heating the wax to a sheen resulted in seepage and the whole process had to be started from scratch. Thats just the way it is sometimes – every clock is different although they all look the same. Metal guage, alloy composition, engraving depth and complexity of engraving design all effect the way you approach a job so you learn on every single clock to a degree.

The following picture shows the finished dial fully slivered. This is not sliver plating – its ion silvering done cold by hand as it would have been when the clock was made. It relys on a chemical reaction that uses a sliver salt with water as a catalyst – great fun to watch and apply.

20170612_222821[1]

Im hoping the next article, part III, will be the finished clock in a few days time.

Part I – Gough Grandfather Clock Restoration C1690 – 1700.

Willam_Gough_Clock_2

This is a Gough I am working on among other things and this article is well worth a read if you want a decent quick backgound in early long case manufacture.

This clock is the one I referred to in my last post that I was fizzing with exitement about working on and Ive not been dissapointed. Its a really early clock as I suspected and is both rare and very interesting. Its says a great deal about early long case clock making and would sit well in a museum.

A bit of background about early grandfathers thats relevant to this clock and understanding it…..

The longcase evolved from the use of a pendulum as a regulator in 1658. Huygens the astronomer invented it ironically. This changed clockmaking from something very difficult to do, to something a bit easier and basic. A pendulum regulator means simpler mechanics and a cheaper design. Thats not to say the clocks were “everyman” but it meant the price of one came down from Porche type money to mercedes pricing. The knowledge of the engineering skills and the industrial organisation was in place to build the clocks so, even early on, parts like dials, chapter rings, the movement, and the engraving were separate skills carried out by separate guilds of craftsmen in separate locations. Knowledge was passed on via rather long apprenticeships – specially on the movement side of things so….. we can say this Gough clock was probably made by a third generation of clockmakers at a time when there were not that many.

Style was instructed and controlled by the apprenticeship system. Innovation and change were not part of the apprenticeship, quite the opposite. It was market economics and aesthetics that evolved style within these tight and norrow guidelines, specially in London which led the country in defining the fashion of the day. This means you can date a London clock from nuances in the style as it changed over time quite accurately. The style of this clock is consistent with 1700 or earlier in the London style, but, this clock is from Devizies in Cornwall which is odd in itself. Having said this the movement is entirely different from any London clock Ive seen with a single chain drive and cage. Anyway, all knowledge spread from London where style was strictly controlled and the further you go away from London at any particular period, the more deviation from the standard you tend to see in the design. I can only assume this chap emigrated from London down to the West country having served his apprenticeship at a London maker or, more likely was buying in the whole face from a London maker which is not unheard of by any means – guilds and demarcation made this style of manufacture and sourcing popular and acceptable. On balance is probably the latter bearing in mind the exotic movement design which I will cover in the second article that will follow completion of the restoration.

I’ve not researched Gough beyond some basics that he traded as a clock ans watchmaker up until 1730. The dial size and square face (no arch) tells me, within 10 years when this clock was made so Im reasonably confident at 1700 or a little earlier. The other major give always on the date are the lack of the seconds hand. Early long case clocks were thought to be unbelievably accurate already and the idea of “seconds” was just alien to people. It wasn’t a unit of time in every day use.  Further dating evidence comes from the quarter hour markings on the inner chapter ring that were included so people could read the clock one handed. One handed clocks preceded two handed from about 1660 to 1690. After that two handers were the norm but needed to have the old one handed legacy markings so people unfamiliar with two hands could still read them. For them hours were measured and referred to in quarters, not minutes which meant maths and education. All this, in conjunction with the larger dial plate and (they increased in size from 8″ in 1660 to 12″ in 1700 at 1″ per year”) nails it to about 1700.

At the moment it looks like a dull monotone boring clock. It isn’t. Its a thing of massive beauty underneath which I intend to show. So to the restoration…

I am guessing the silvering wore off in patches and the wax fell out of the numerals to such a degree that somebody just gave up and wiped it all off in order to maintain some level of neatness. I’ve considered the possibility that the chapter ring was not originally silvered or filled with wax as I know there were some brass chapter ring clocks out there at this time. I’ve seen a few and they are just a clock face carved into brass really, single plate and engraved outside the parameters of the London style.  I checked for old wax in the dial grooves at their deepest point but there is none, annoyingly. There should be some there. In addition to this there is absolutely no remnant of chapter ring silvering.

The thing is that this clock is so typical of the London face design that it is almost certainly a standard design clock where the wax and silvering has been steam cleaned (or the equivalent) as opposed to a naked all brass facsimile. Apart from this it has to be considered that there is absolutely no advantage commercially in the maker not finishing it off 100% London, having gone to the trouble and expense of getting to the point where its a couple of simple last stages. The clock would have been worth more in the London style that always led the fashion with its conservative values and quality; so he would have finished it a such.

This clock therefore needs re-silvering and waxing by hand. There isn’t any other way to achieve the intended result so you have to use the original processes and materials. Its very basic stuff that shares little with modern production processes. The chapter ring picture below shows the easy bit of the waxing process. Taking back the wax level with the engraving is the next bit.

You cant use the processes or power tools you might think as the shellac is glass like and to compound things the sheet metal production of the era wasn’t up to much. The thickness and relief of the sheet varies. If you grind it with the straight edges on power tools you will end up taking the top of the relief off and inevitably wearing away the engraving in some places more than others. This means hand tools and judgement and no second chances because there are no spares or routes back other than re-engraving. If you have to re-engrave for any reason you might as well scrap the clock because it looses the authenticity. Wear off the engraving and what you have is a sheet of brass on which you can, at best, make a copy of what was there before.

I hope this has been enlightening and if you have a clock like this you want restored you know who to call!.
20170608_220324


Electric Cuckoo Clock Repair

I love cuckoo clocks. Its as simple as that. I have a menagerie of the things. I repair anything from a wooden cage victorian to a 20th century electric Conran.

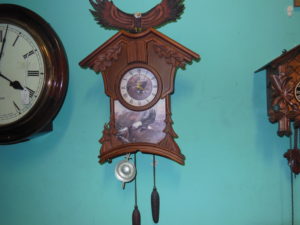
Electric cuckoo clocks sound like a step to far into cuckoo insanity but this is not the case and all the customers I have who own them actually prefer them to the purely mechanical equivalents.. They are great fun, often have features impossible on a mechanicals, and are reliable.

That said they do fail from time to time and need components replacing. I hold spares for most of the popular electric movements and mechanics so there really isnt any cuckoo clock I cant get back to singing condition.

Common problems on the electric cuckoos are:

  1. Electrical connection failure due to corrosion at contact points.
  2. Worn plastic gearing.
  3. leaked battery damage.

FIX IT YOURSELF ADVICE: Before you decide you need a fix have a quick look at whats going on inside yourself and do a connector check. This involves removing the back panel of the clock and making sure everything looks like its connected. If it all is still connected then disconnect the logic board connectors and re-plug them back into the sockets. This is often enough to remove light corrosion at the contact points and get the clock working again.

If all else fails then pack up your clock and send it to me (give me a call first so I know what and when to expect). Ill find out whats failed and quote you for whatever component needs replacing.

The only caveat here is that I might not be able to match the sound of the cuckoo as different logic boards have different sounds and you cant get them “by sound type”, as it were!. If its just a mechanical failure and the cuckoo still works then I should be able to return it to its original configuration and settings.

DSCN1694

Oh and heres a picture of my 1860 black forest wooden cage with a fusee movement and delightful Dresden styling. Both do the same job and deliver the same joy.

The Dresden clock is up for sale at £3000 which is about £1500 overpriced to ensure absolutely nobody buys it. It belongs to me and all the people who come in here to gawp at interesting clocks – and thats the way its staying!.

Bavarian_Cuckoo_Clock_Repair_1