
I have for some years been interested in, and serviced Metamec clocks. This is because you can work with Metamecs and get a bit of everything from a movement perspective. Metamec bought in movements for a good proportion of their clocks over the companies lifetime. Suppliers changed with price point and technology which means that covering Metamec for all the spares I ideally need is challenging!.
It takes some time to source and refurbish good quality components so I tend to use my entire stock myself and do not sell the parts outside of service calls / jobs. I cover all of the following for clocks that are now turning up from all over the UK and in one instance recently, Australia.
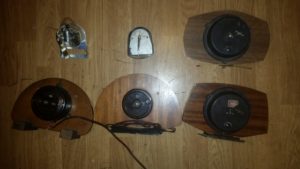
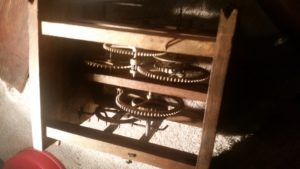
Series 1 cabled
Series 1 cabled with base mounted external starting spiggot (becoming rare)
Series 1 Cabled Alarm
Series 2 cabled – wall and mantle clocks
30 hour mechanical
8 day mechanical
Keinzle 606 electro-mechanical (two derivatives shown below)
I also repair or replace all quartz and balance wheel based battery movements. These are not pictured but are fairly easy to identify in that they are oblong with a battery horizontally at the bottom on the shortest edge of the oblong. About 2.5 inches by 3.5. Im out of unit stock for these at the moment but have components so they are not pictured below. They tend to be the least requested units for fixes and are very reliable.
The older sieries 1 and 2 cabled movements are not the same story at all – constant problems with coils, tensioners and wear – often all 3 on any given movement.
I am all for people having a go themselves and publish articles on this blog about how to do quite complex things, however, I have yet to hear back from anybody who has managed a cabled movement fix on their own. Ive tried to help several people via email but all fail. The problem is the series 1 and 2 movements are actually quite finely balanced and require putting together quite carefully once you’ve gutted and cleaned it. All the components themselves look brutal and crudely manufactured but the truth of it is that they are all within quite fine tollerances in terms of their positioning and placement. Wear in quite obscure areas causes problems not least because everything is so cramped you simply cant see “in” to witness the physical symptoms and diagnose the issue.
On the other side of things the Metamec mechanical movements are very good generally speaking although I say that in light of the fact that they were not made to last. When they do fail its normally quite catastrophic as they tend to go around the plates and fixings where things warp or wear. The main plates on the 30 hour movements go all the time and once bent out of shape cannot be returned to the perfect flat surface all the spiggots are expecting. The 30 hour goes more because the act of winding puts pressure on the plates via leverage when you turn the winder. The 30 hour therefore gets 8 times more wear than its 8 day equivalent so I mostly swap or convert those to an alternative movement – an 8 day if available.
The keinzle 606 is an epic movement and I am quite precious about my stock of them (to my surpise!). If you have one of these keep hold of it – a future classic with a good deal of kudos already; prices are high.
I also do full restorations.
For the brassy Metamec clocks (and there are many!) I a do 3 stage chemical clean that gets the brushed or textured finish back to factory condition. Doing it any other way either doesn’t remove the oxidation deep in brushed texture or takes the brushed finish down by smoothing off the microscopic ridges that give the glowing brushed /textured effect.
In terms of woodwork I can restore most of the Metamec finishes although replacement is often the route for things like sun damaged and crackled acrylic in some of the metallic finishes.
I can replace most glass although this can get expensive for the rarer stuff. Metamec glass faces are particularly convex to accomodate the long spindle clearance that Metamec probably designed in so that they could keep movement variants to a minimum in a range where face depth and material varied greatly. This means modern replacement glass doesn’t usually fit and vintage spares must be bought specifically, often on sale as one off items.
I really enjoy the Metamec work as its become somewhat of a specialisation for me so pictures of your Metamec are always appreciated. The long term plan is for an indexed gallery somewhere on this site for public reference, however, due to the astonishing time commitments of this job its about as likely to happen as the garden 2m reflecting telescope observatory that is definitely definitely maybe going to happen. Eventually.
If you would like me to fix your Metamec please email me with a description of the problem, and what you would like done. A few pictures of the clock are really helpful if you want restoration work done but not essentail if all you need is to get the clock working again.
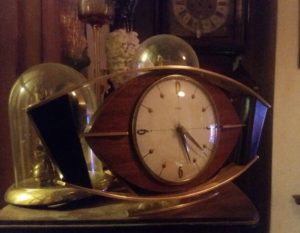
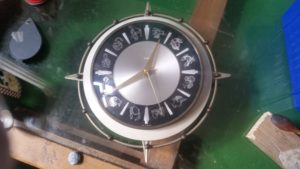
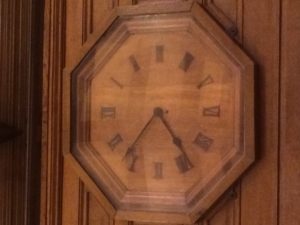
Finally, I recently did a job for a client on a retirement clock they wanted completely restored. I liked it so much I went and bought the identical model which I have just brought back to life with the chemical clean, laquer and silicone UV resistant polish (car polish is good on paint finishes they used). Yes it does have a 606e. Ive never paid too much attention to this model but its really grown on me – the sort of 60’s – 70’s transitional design is very cool. Its come to something when your parents wedding presents come round in fashion again but I cant help liking it!.
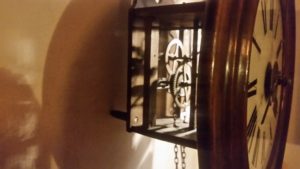
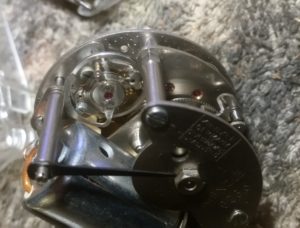 This is by far and away my favourite Metamec movement. It isnt a Metamec movement of course but Metamec used other clock makers movements extensively. I’ve even found a smiths stamped movement in one which was definitely an original fitting so they were buying from their main competitor at one point. Heresy but there you go. Im glad they did to be honest because as a Metamec specialist it gives me much more variation and I get to work with masterpieces like this 606e.
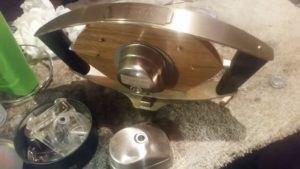
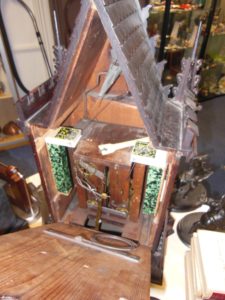
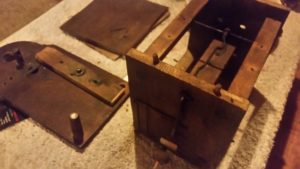
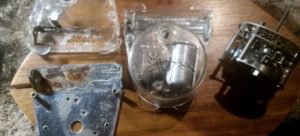 I couldn’t save this one so I had to replace the entire movement inner. I maintained the old movements mounting plates with a bit of modification – the movements are largely the same in the series but each one mounts differently on each model of clock and various plates and spacers are essential. There wasnt a lot of consistency in the production of Metamecs and they did whatever it took to survive commercially including completely changing key elements in identical looking models over the years. This means you can get most clocks with at least 4 movement options all of which change over the years. Its what makes them interesting to work on.
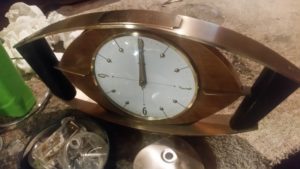
Recent Comments