
Ok another give away article robbing myself of a days work!.
If your clock doesnt work then cleaning it is a good first step to establishing what the problem might be. You need the thing to tick over under its own steam to diagnose problems beyond cleaning so its pretty much always the first job on the list. Any clock repair is going to involve this.
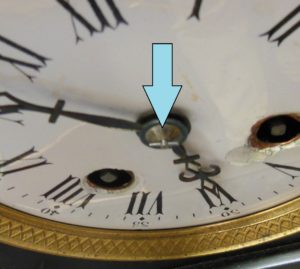
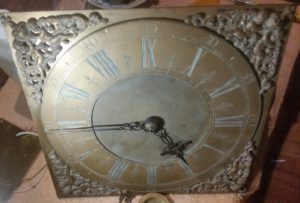
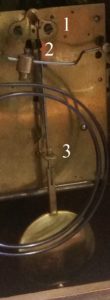
Almost all clock hands are held on by one of two methods and you have to get them off to remove the movement from the case.
If its a lynch pin fixing then do the following. You need to remove the lynch pin that is threaded through the centre spigot. Whats not obvious is that this pin is usually tapered. This means its thicker at one end and will only be removable from the thick end. Get a magnifying glass on it and decide which end it is you want before you try to remove it. Now put a cloth or cardboard template over the face to avoid scratching it if you slip while removing the pin. You can make one by cutting slit to the centre of an A4 card or paper and then slide it onto the face with the spiggot sticking through the slit. Now use pliers to remove the pin. The hands will be friction fit so youcan just pull them off. Dont use pliers if they are stiff – oil and a firm grip with your hands through a thin polishing cloth will do it.
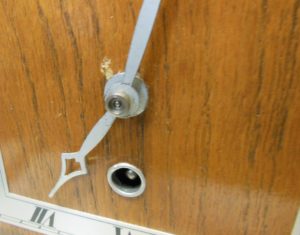
If its a screw fitting then simply unscrew it and pull of the hands as above. Its a normal thread – not a reverse one. If you snap off this nut then the clock is screwed so dont!. If its stiff then get some long handled long nosed pliers and twist it by 5 degrees – enough to loosen it but not enough to torgue snap the spiggot.
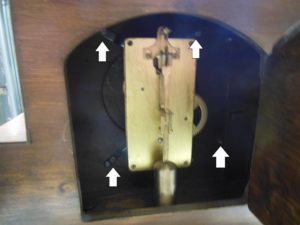
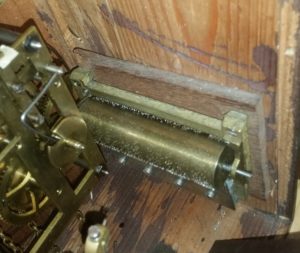
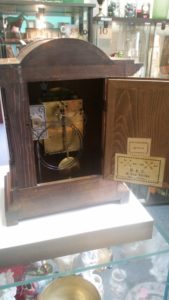
Ok once the hands are off you can remove the movement. If you look in the back of the clock you will see its held in by four screws, one at each corner that are normally on extenstion arms. You should now simply be able to pull the clock movment from the rear of the clock. If your clock has a chime bar that appears to be getting in the way do not try and wiggle it past – you will damage the chimes. Remove the chime bar by unscrewing the fixings that are mormally on the outside of the case underneath although some are fixed internally. My point is that it needs come out even if you can get the movement out without doing so because its fragile and gets easily caught by the snaggy and nature of clock movements generally.
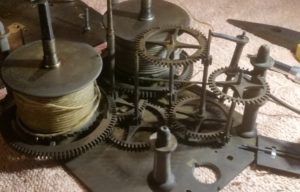
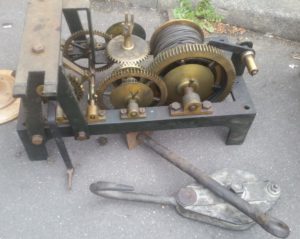
Ok you have the clock movement out. Now the bad news. You have limited options without disassembling the clock completely and taking the plates apart. Ill come to how you can avoid this but generally speaking you need to get the plates apart for the following reasons.
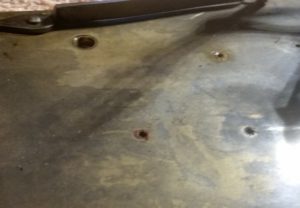
- Its the best way to get at the spiggot holes cleaned.
- If you just put it in a bucket of hot soapy water then water gets into the spring barrells. Unless you oven dry the clock after this the springs will rust and your clock is in very bad shape with an expensive repair bill
You probably dont want to attempt to get the plates apart so heres a cheat!….
What you can do is immerse the clock upside down so only half the clock (without the spring barrels) is cleaned. This seems a bit bodge (and it is!) but it will partially clean the wheels at the top of the power train which are most sensitive to dirt. Essentially you are attacking your problems worst effected area in doing this partial immersion. It wont get a really dirty clock going again but it will give a lightly soiled clock another couple of years service before it needs it doing properly by somebody like me. If you have a low value clock you want to repair get going just because you feel like it this is a great way of making fast cheap progress.
Once you’ve soaked the movement top in soapy water then do you can to carefully brush off any dirt with a clean paint brush or ideally jet spray of some sort. You want to avoid putting anything rigid inside the movement as you will snag or force something and its game over. Once you’ve done what cleaning you can then you need to rinse the area that been submerged in boiled kettle water (careful not to get any in the barrells). Kettle water has the minerals such as calcium carbonate partially removed so any residue left by the drying water will be kept to a minimum.
Now oiling….
You need to use clock oil. I get all mine from Priory Polishes which is an old fashioned business with all the right stuff. I wont recommend specific products but have a look at the site as they do all sorts of restoration reagents including amonia based cleaning agents you can use for your immersion clean. Heres a link – you cant go wrong with this company and Paul there makes up a lot of his own chemicals to do an uber job. Hes well known in the clock trade and its “where those who know go” http://www.priorypolishes.co.uk/shop/front/
Overall I have to say that the best advice is to send the clock to me for a service because Ill do the springs for you as well. A lot of the time the main issue with failing clocks is that the main springs are worn down and are not delivering the power the clock needs to run efficiently, if at all. If a clock has been left standing fully wound but not running for a few years the springs take the form of the arbour they are tensioned on an lose power – I see a lot of that. Servicing isn’t particularly cheap, or that expesive either so I now recommend a full set of springs on every service I do on mantle clocks. If you do that you really see and hear the difference and its cheaper in the long run which is what you want if your going to spend a fair amount of money anyway.
Hope this helps your DIY efforts – you know, as always, if you mess it up I can sort it out.
![20170612_222821[1]](https://braintreeclockrepairs.co.uk/wp-content/uploads/2017/06/20170612_2228211-300x169.jpg)
Recent Comments