I repair clocks for people who don’t want to repair them themselves. Its an obvious statement but that’s why I publish my “how to” guides on this blog. Im not robbing myself of a job as the people who do this are going to do it whatever and good luck to them. I’d just sooner they had a good time doing it and avoid the annoying pitfalls.
The inspiration for this article came to me after I received a text enquiring about a wall clock repair. A straight forward movement replacement. I text back saying that he was welcome to bring it into the Bratiinree Antiques Centre where I am based Wednesday through until Sunday on most weeks 10am – 4.30pm. If you are coming to see me then you are welcome to use the car park at the back of the centre which is much more convenient than the towns facilities for parking in the area. The centre has served as an excellent drop off point for clocks and many customers now bring theirs in. This is however subject to size on most occasions.
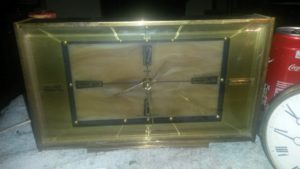
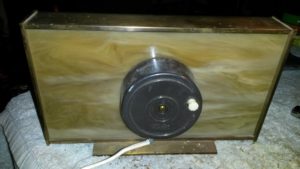
Meet Lyndon and his wall clock.

For those with the enthusiasm to attempt this DIY here are a few tips.
All this assumes you have got as far as looking for replacement units on ebay and are faced with a choice you don’t know how to make.
With larger clock (say up to half the size of Lyndons above) its often essential, or desirable to fit a high tork movement. It just beefs up the turning and lifting power of the hands. Bigger hands need this extra power. The only thing about this is that you will find there is less choice in mandatory options e.g. spindle size, but get one if you can if you have a larger clock; its likely fitted with one already as you cant tell the difference from the outside. I get the feeling there is better engineering behind the high tork and the standard units I have taken apart. Those looked like they were made to last only so long and economically basic.
If you buy a standard unit try and get a Seiko. At the moment they are the best in a field of cheaply made alternatives. I’ve had units from many suppliers and quality really does vary with delivery if you shop at the cheap or even mid-priced level. Its not that the others wont work, its just that 1 in 10 turns up dead and if you drop it on a wooden floor it will likely simply stop working with no apparent damage.
The only down side on the better quality Seiko movement is the price. In addition they are hard to source with hands inclusive which should be your preferred option if you can get a hand match. But they are 3 times the price. I think its still worth it but then again I can charge my expense on for repairs. I might see it differently for a simple cheap fix for myself on an unimportant clock of some sort.
The other thing that goes in cheap movements favour is that they are excellent for making mistakes on. If you find out you have ordered the wrong dimensions when it comes to fit it, its not a financial disaster. Equally if you need to modify the unit or cut bits off it then that is better off going wrong on a cheap one. If you are successful you’ve got a cheap good fix that will last a couple of years or more.
The next thing to consider is the option of radio controlled movements which set their own time automatically. I say “consider” because if you buy a good brand unit it should keep pretty much perfect time. People forget that you have to allow for the fact you are forced to change it twice a year anyway and in doing so reset the accuracy of the clock. It only has to run at an accuracy of 1 min in 6 months in reality. Radio controls primary advantage is that it sets the clock for you seasonally like a network linked device. I am speaking of course as somebody who enjoys setting clocks back and forward seasonally. Its probably not for everyone.
Dimensions are the next thing and this is where its gone wrong a few times for me. Despite knowing what I’m doing I make errors from time to time doing this.
The pitfalls are the spindle length, the hand fixing type (euro or standard) and the spindle diameters. You need to know these accurately. This means you have to remove the failed movement before you start to think about what you need to order.
You have to be accurate with your replacement but its often the case that you cant get exactly the right option on hands or spindle length. You have to compromise within the tolerances of the clock body and movement mounting design. I have made up fitted jiggs in some instances just to reduce exposed shaft length by 3mm where I haven’t been able to source the right spindle length with the essential hand fixing size.
At any rate you will need to get the movement out before you do anything. Getting the face off so you can remove the hands is the core challenge – the rest is reasonable obvious. I cant tell you how do do this – it really is a work it out yourself job on every clock. The only thing I will say is that fixings like bezels or glass mounting are rarely screwed (theres a joke there somewhere) and everything tends to be clipped or held by friction fit, screws or “turn and unlock” fixings. The advice here is that if you are really giving it any kind of force that will permanently bend or scratch anything then you are taking the wrong approach.
The clock is designed to come apart and its usually the order in which you remove sets of pins and types of fixing in layers in a sequence. Layers that look separate can often be joined at points you cants see while they are in place. The face bezel may be a single unit for instance, with its fixings sticking through the back of the clock as pillars with bolt fixings. You need to really check it out work out whats going on before you apply any force – the fixings are designed to be invisible from the front of the clock and the method of connection is often counter intuitive.
Once you have the face off then unscrew the central nut which is normally round and simply unscrews as you would expect. Note that I am not referring to the larger base nut directly against the face. While removing the central nut above the minute hand you need to hold the minute hand. If its stiff just start it off with a pair of small pliers and it will unscrew easily.
If you have a seconds hand instead of a central nut simply pull it off. Use your fingers as pliers will damage it. The same then goes for the minute and hour hand – they will simply pull off and can be quite stiff so get a firm grip on the central area and pull up. As a last resort lever it up with a flat tool like a metal ruler but be careful not to scratch the face or mask it beforehand.
Once the hands are off in most cases there is also a ring nut you can see on the expose thread of the spindle sticking through the face. You must get that off before you pull the movement off or you will damage the face and probably ruin the look of the clock – if you warp the centre the bend on metal clock faces distorts right across in most instances so take care on this nut removal. Beware, its really easy to scratch the face doing this so if you want to be sure cut a paper mask (paper circle with a radius slit in it) and apply it to the face before any sharp tools go near it.
Some movements come with hands when you buy them. This is the option you should choose if you don’t mind changing your hands but there are limited styles and sizes available. Most people I do this job for want to keep their original hands or get something very close. My advice however is that if your doing it yourself I highly recommend you buy your movement and hands together. Fitting old hands to new movements is often a bit of a mish-mash and its easy to order the wrong specification. The rest of this article is about how do do it while keeping the original hands intact.
Once the movement is out, measure the spindle length with a ruler or vernier gauge (digital vernier gauges are £12 on ebay by the way! amazing.) This length should be measured without the rubber collar that sometimes sits on it to act as a gripping pod between the movement and clock face.
When you buy the movement on eBay or Amazon you will notice they are listed by spindle length or in some cases “to fit a face of {a number}mm thickness”. This “face fit” way of describing length is a terrible way of listing the spindle lengths as it simply isn’t possible to measure face width on many clocks – try it!. For this reason I always buy from a vendor who lists in actual spindle length, do this and you wont get it wrong.
Its tempting to guess the face width or attempt to measure it with a matchstick or suchlike but its unlikely you will get it accurate to 1mm. That may well make all the difference getting the spindle nut back on.
The other thing it is tempting to do is to imagine that ordering a longer spindle than you need ensures it will absolutely poke right through. The problem is that it will do exactly that and then jam up against the glass. Note that you have to fit a seconds hand on top of the minute hand which normally raises the three hand assembly by 3mm. In summary, getting the movement right out and measuring everything as accurately as you can saves all the trouble that can crop up on this job.
The next thing is identifying the hand types and spindle diameters.
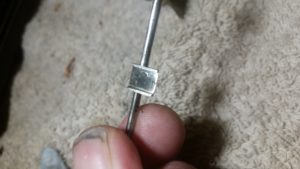
- If your middle spindle, the one inside that sits stepped in and above the second hand spindle, has a FLAT double edge then you have EURO hands and you need to select a movement specified as this. Some vendors dont specify this so take a good look at the photos to check you have the circle with the flat sides in the centre of the minute hand.
- If your spindle is round simply measure the diameter of each with a ruler in mm (or with a handy vernier gauge!) and ensure this matches the details of the listing. If it isn’t listed find one that is because there are a couple or three of variants (?).
In most cases there is the option of a sweeping or ticking movement type. Please just skip two paragraphs if you don’t want to be bored to death by my quasi religious beliefs on sweeping clock hands being mechanical heresy.
I prefer ticking because if the second hand stops for some reason, you can tell if its just slipping by checking for the tick. However on a sweeping movement, if the seconds hand is a bit lose on its crimping / poor factory fit, it can simply continually slip on its spigot and the clock appears not to be working – you can’t hear it tick. This means you have to re-recrimp the spindle mounting on the seconds hand and hope you guessed it right when you put it back on. If it doesn’t work then your back to square one with the added uncertainty that you might have made it worse.
I just find them frustrating to work with and very un-clock like. Clocks are full of moving ticking tangible sequential parts and forces on a unitary basis – thats what makes them a joy to work with. If you take a ticking quartz movement apart its still got the same gears and ratios that clocks have always had although to be fair the sweeping variety is only minutely different. Sweeping hands are are a less functional step away from a near perfect mechanical design principle.
Lastly, if your movement is not square 56 x 56 mm or its oblong with a larger battery then it all gets rather complicated and indicates you have a pre 1975 movement which you probably need my help with. Do feel free to call or email me to discuss – click the link to the contact page.
There is one more thing. If you convert a mechanical clock to a quartz movement you remove at least 50 if not 90% of its value. Its worth more broken with the original movement than it is converted to a working quartz one.
Good luck as always and thanks Lyndon for you excellent clock picture and a good laugh.

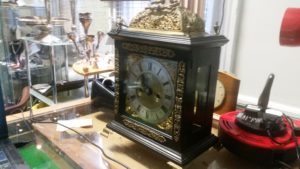
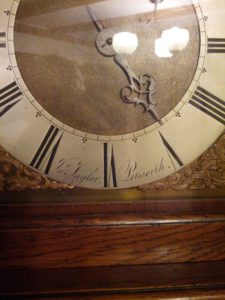
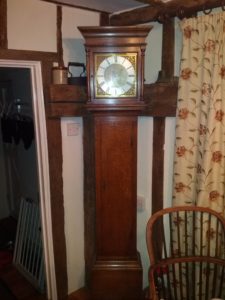
 I run my clock repairs from Braintree Antiques Centre and I try and keep the blog on this site separate from the centres because… well, this blog is about clocks and repairs, not about selling clocks. That said I have been asked several times to source a “grandmother clock”. What people mean by this is actually a cottage style grandfather; there is no such thing as a “grandmother clock” but the term is widely used for smaller grandfather clocks. Thats what this clock is – a short grandfather suitable (in height) for a modern house with lower ceilings. So here it is and here is the
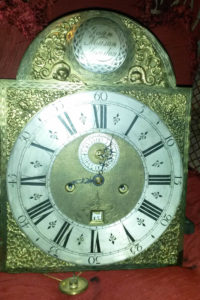
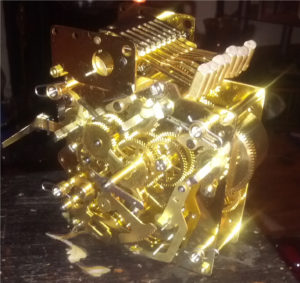
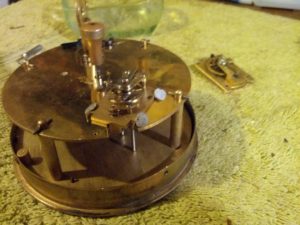
 This is a clock thats just been serviced and repaired on my testing jigg. Im narrowing down the accuracy ready for delivery in a couple of days.
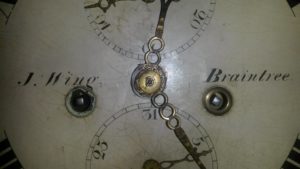

Recent Comments