
 This post is mainly about dating a grandfather clock and Elvis.
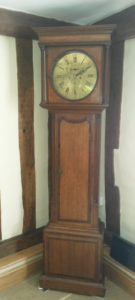
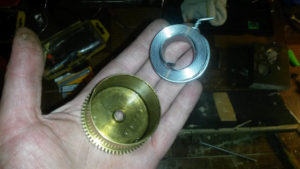
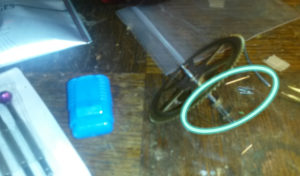
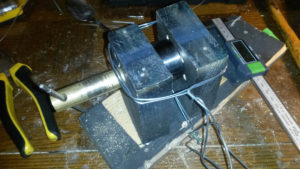
I came accross this today. The weight cat gut had snapped which is a reasonably straight forward thing to fix and I will be publishing a guide on doing exactly that in my next post.
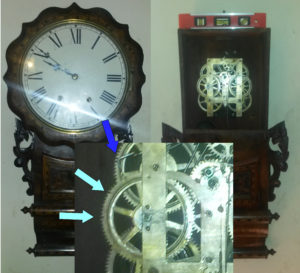
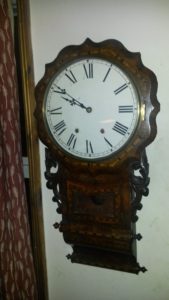
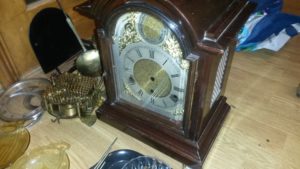
This Redshaw Newcastle clock is intersting for a few reasons. The most noteable is the round dial. It is actually a round dial as opposed to simply a round appeture over a square plate. Ive not seen this before, or convex glass on the head so I did a bit of research.
The maker is Redshaw of Newcastle. John Redshaw apprenticed with John Beech of newcastle in the early 18th century as far as I can work out. This conflicts datewise as the style of the face markings is firmly 1775-1805. It seems likely to me that this clock was produced by an apprentice or journeyman of Redshaws because he would have been getting on a bit when I believe this clock was made which I will come to once I have explained what evidence there is for an accurate appraisal of age.
The clock is original, everything about it is “right”. Ive seen other examples of Redshaws work and its very typical noth in terms of style and materials. As an aside to the date info here it migh interest you o know a very similar clock sold for £2150 in 2012 when values were low – thats a very good price for the buyer in hindsight. Clocks like this were selling for £10,000 ten years ago so even though the £2150 seems low its all comparative – this is a good clock with reasonable bragging rights!.
Dating this clock was more difficult than usual but the same rules applied to this as all the other clocks I see.
The first thing I noted was that the dial doesnt feature any of the legacy markings of the old one handed style clocks, such as markings for the half quarter hour; this means its likely to be 1740 onwards.
To further refine this identification I looked at other face features. The dotted markings for the minute hand refelcts the fashion of the period from 1775 to 1810. Another key feature that allows the clock to be placed is the sequencing of the arabic minute markers as 5, 10, 15 etc which was used until 1805 when it was replaced with 15, 30, and 45.
A great way to put a grandfather clock within a date range is the face size / diameter. Dials increased in size from 1680 (10 inch) to 1860 (15 inch). This means you can often guess a grandfather clocks age within 15 years each way just by measuring the dial, although there were regional variations in this. An ancillary general rule is that at any given time dial sizes were 1 or 2 inches wider on Northern clocks for some reason. This applies to the clock case as well which increased in size over the 200 years of production with the north of the country being slightly bolder both in terms of size and deviation from the “standard” london design style led by London makers.
So at this point we know the clock is confirmed on three levels as a 1775 – 1810 item. Now, this clock is from Newcastle quite a way from London, however, if you look at it proportionally its not as big as one might expect from a clock from 1810, nor is it particularly grand or overblown. Its therefore less likely to have been produced later in the date range. The midpoint of 1775 – 1810 is 1790 so if we take off 10 years to balance the northern effect then the clock is likely to have been produced between 1780 and 1790.
Another hint on dating these clocks… look carefully at the roman numbers that are engraved into the dial. If the clock is original as opposed to a reproduction you will be able to see that the roman numerals have been hand engraved. This shows as a slightly bumpy inset relief on the numbers. Its where hand tools were used to gouge out the numbers into the brass plate. There SHOULD BE MISTAKES. This is important. Machines used in fakery or retro-styling of a modernish item dont make mistakes. If its perfect its not old unless its a really outstanding example from a top end maker which will be obvious anyway. Ive enlarged a picture of one of the numbers to show what I mean.
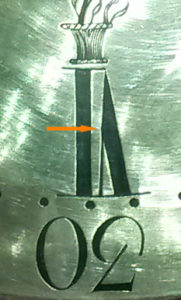
The orange arrow shows where the engraver has had to change direction in the middle of a numeral. Its only a small error but it shows humanity in the production.
When this clock was produced the skills employed were high status. Computing and programming have a similar social status today as occupations. What is also worth considering is that the engraver would have been working on something quite valuable and it would have been a pressurised task to complete. If he had slipped with his chisel and marked the face it would have been a question of scrapping it and starting again.
I never ever swear when I do clocks because that would be wrong. This allows me to predict with some confidence that the engraver didnt swear extensively when he realised he was going in the wrong direction half way up the V.
Its this sort of human connection you get with old clocks that make them a joy to examine.
When buying a grandfather clock, consider that the case and the movement might not be an original pair. This significantly effects value simply because there are far more frankenstien grandfather clocks than there are originals. Its not really surprising as wooden cases rot and movements are engineered for longevity. The movements were always valuable and would simply never have been scrapped unless severely damaged or worn which generally speaking takes hundreds of years.
It can be quite hard to definitely identify an unmatched movement and case but heres what to look out for on a first look.
Is the plate on which the movement sits (a wooden platform that the movement bolts to) the same material, colour and condition as the rest of the clock interior facing panels?. If you can see newer cuts on the seating of this shelf it means its had to be modified to fit. That being the case its not the original movement in all likelyhood.
These items were high value when produced and all the wood would have been cut to fit perfectly and elegantly with room for adjustment where necessary, and tight fitting where it was not. When looking at this dont mistake modification for wear and tear. It might be that the shelf has worn the seating out a bit; after all, that shelf supports between 20 – 30kg of weight on narrow connection points. This means its common to see original parts that have been repaired and replaced in part, however, what you need to do it really look at it and say “can I see a factory fit in there somewhere”.
On this point, many people believe (correctly) that clock makers bought in cases and case makers bought in movements. It was common sense to farm out the specialist jobs such as engraving to third parties and a surpirsing amount of components, such as the spandrels on the face, were bought in as prefabricated components from a set range common throughout the industry. The point here is that this tends to encourage people to believe that there will therefore be some innocent mis-match at the point of origin. This is a great way of convicing yourself that you are are going to buy an original as opposed to a frankenclock – a little knowledge is a dangerous thing.
To be clear, if a clock was sold by a maker, at the time is was bought the customer would most probably have been unable to tell. This means that you shouldnt be able to either.
If you clock movement looks badly engineered into its case then its probably a frankenclock. If you see one in a shop thats cheaper than it should be its also probably a frankenclock. Any retailer that sells you a grandfather clock is going to know the difference because of the difference in its value. A good frankenclock will cost about £1000 as of today (July 2016) and an original case and movement will cost £3000 for an item of the same approximate age and style. Dont expect the retailer to tell you if its a matched clock and case. Theres a reason for this beyond sales polotics. It is that people who know about clocks use the term “clock” to describe only the movement. This means if a dealer tells you its an original clock what he may be referring to is the clock movement and is not necessarily including the case in his implied description.
This is not subdefuge or dishonesty and happens because people who by grandfather clocks for the first time tend to give the impression that they know what they are talking about and so the conversation is conducted under certain assumptions about terminology. Or your being ripped off and not told the whole story unless you ask specifically. It depends on how you look at it!.
I hope this encourages you to learn to date grandfather clocks. If you want further reading then I can recommend any book on grandfathers by Brian Loomes who is basicly a clock knowledge demi-god. I emailed him to ask a question, not really expecting a reply. He emailed back to tell me he was too busy to answer my email. I am blessed – I was told to go away by Brian Loomes which is about a high status as being able to say you were beaten up by Elvis. If you like clocks.
[Many thanks to D for letting me take the pics – cheers old bean]
 I estimate that this home made obelisk is about 25ft high. It was constructed from concrete reinforced with steel bar. Thats what I call commitment. The absolutely best thing about clock people is that they appreciate the better things in life. I meet tons and tons of the nicest people you can imagine and all have a story to tell. Theres something about mechanical clocks that attracts the more interesting people and they are all a pleasure to meet.
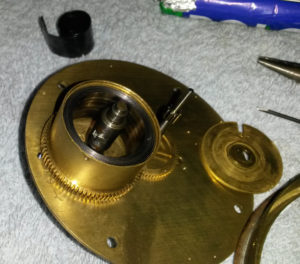


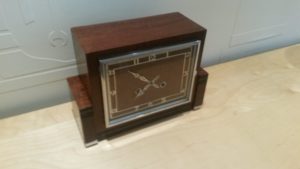
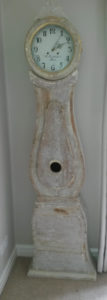 I recently repaired this Mora clock. These are quite rare now and originated from 18th century to the middle of the 19th. They are really good looking clocks and thier shape in sweden is as iconic as the grandfather clock you or I would envisage.
Recent Comments